
Aztec Code in Microsoft Excel
An example how to use StrokeScribe barcode generator to make Aztec barcodes in Excel.
Setup
- Download and install the barcode generator
Placing Aztec Code in Excel Using Active Document
1. Switch to the Insert tab on the Excel Ribbon and click Object.
2. Look for the StrokeScribe Document in the list of available objects:

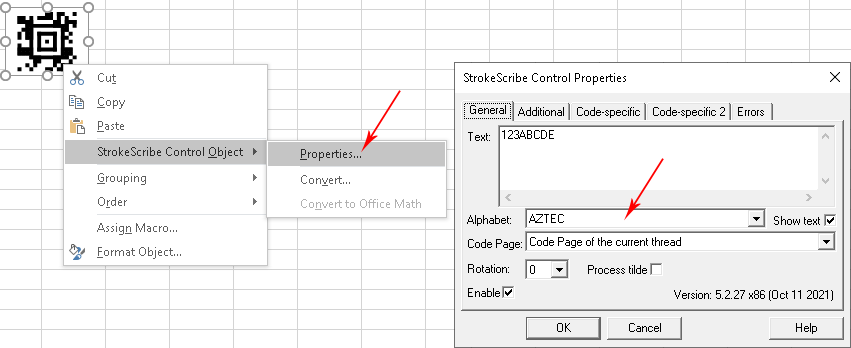
3. Right-click the barcode object, select StrokeScribe Control->Properties from the context menu.
- Go to the General tab in the barcode properties dialog;
- Set Alphabet = AZTEC;
- Type any text in the Text field.
Aztec Code Customization
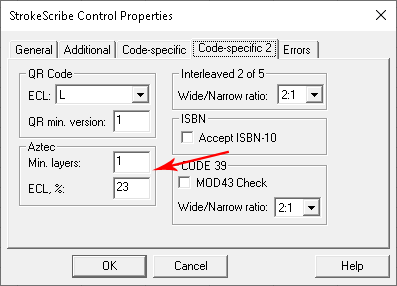
Switch to the Code-specific 2 tab in the barcode properties dialog.
Here you can configure the error correction level and fix the minimum matrix size.
How to Remove a Border Around the Barcode
Use this example from the Excel barcode generation guide.
Placing an Aztec Barcode in Excel Using ActiveX
1. Switch to the Developer tab on the Excel Ribbon and click Insert->More Controls as shown below.
2. Select StrokeScribe Control from the list of available objects and press OK:

3. Click anywhere on the worksheet to insert the barcode object.
4. Activate the Design Mode button on the Developer tab.
4.1. Right-click the barcode object, select Properties or activate the Properties button on the Ribbon:
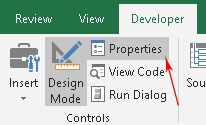
5. Use the property list to customize your barcode. To create an Aztec barcode, modify the following properties:

Linking the Aztec Barcode Object to a Cell
To automatically update the barcode when a cell content changes, use the linked cell technique.
Aztec Barcode Customization with VBA
1. Press Alt+F11 to open VBA window. Double-click the current worksheet name in the VBA project tree:
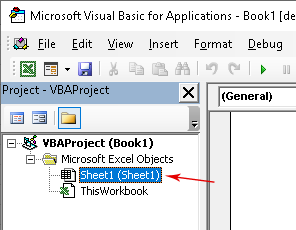
2. Paste the following code into the VBA editor:
Sub CreateAztec()
  StrokeScribe1.Alphabet = AZTEC
  StrokeScribe1.Text = "ANY TEXT"

  ' Optional barcode parameters:
  StrokeScribe1.AztecECL = 50
  StrokeScribe1.AztecMinLayers = 30
  StrokeScribe1.QuietZone2D = 1
  StrokeScribe1.FontColor = RGB(0, 0, 255)
  StrokeScribe1.Rotation = 90
End Sub
3. Place the caret into the CreateAztec() Sub body, press F5 to run the code and switch back to the Excel window to enjoy the barcode.
To encode data from a cell, use the following code:
StrokeScribe1.Text = Range("A1")
To encode a byte array, use the following code:
StrokeScribe1.Alphabet = AZTEC
StrokeScribe1.CodePage = -1
Dim b(1 To 3) As Byte
b(1) = &H1
b(2) = &H2
b(3) = &H3
StrokeScribe1.Text = b
Related Tutorials
- Barcode in Microsoft Excel
- Using Formula to Create Barcode in Excel
- Using DLL version of the barcode generator in Excel


© 2026 StrokeScribe. All rights reserved. Use of any portion of this site constitutes acceptance of our Terms of Use and Privacy Policy. The website material may not be reproduced, except with the prior written permission.