Barcode Ribbon Add-in for Microsoft Office
This add-in simplifies the process of barcode placement in Microsoft Office programs. It adds the new StrokeScribe tab into Office Ribbon which allows to insert barcodes of most popular types in one click.
The add-in is compatible with:
- Word
- Excel
- PowerPoint
- Visio
Microsoft Access users may add StrokeScribe barcode control into their reports using Design-> Controls-> ActiveX as described here.
Working with StrokeScribe Barcode Add-in
1. While running Excel, Word, PowerPoint or Visio, select the StrokeScribe ribbon tab:

2. In the Add New section (marked as (1)), click on the Insert Document button to insert a barcode object. This is the simplest way to insert a barcode if you are not planning to modify it with VBA. To modify your barcode, double-click it.
Note to PowerPoint users: instead of double clicking, right-click the barcode and choose Properties or StrokeScribe->Properties.
Note to Word users: to make your barcode floating, right-click it, choose Format Object, switch to the Layout tab, select your Wrapping style.
3. If you are working with VBA and want more freedom in barcode object manipulation, use the Insert ActiveX button in the Add New section. To modify barcode properties, you need the Developer tab to be enabled. Switch to Design mode from the Developer tab and use Properties button (near the Design mode switch).
4. The Fast Add section (marked as (2)) can be used to add a barcode of one of predefined types and with some predefined text. Enter any data you want to encode in the barcode into the Text field and choose the barcode type - a click on the Barcode type button will open the barcode gallery. Here is the list of barcodes available in the Fast Add gallery:
- AZTEC Code
- CODE 128
- CODE 39
- Data Matrix
- EAN-13
- EAN-128 (GS1-128)
- Intelligent Mail
- ITF-14
- PDF417
- QR Code
In case you leave the Text field empty, the barcode will contain a predefined demo text. You can change this text by double-clicking the barcode.
Downloading the Add-in
This add-in is not a standalone solution. It is just a helper to start using the StrokeScribe ActiveX in Microsoft Office.
You need to download and install the StrokeScribe ActiveX to use this add-in.
To download the add-in, fill the form below:
What to Do If You Don't See the Add-in in Office
1. Select File->Options.
2. In the Options dialog, select Add-ins. Check the StrokeScribe add-in is displayed in the Active Application Add-ins section as shown below:

3. Go go the COM Add-ins dialog. Check the StrokeScribe Add-in is enabled:

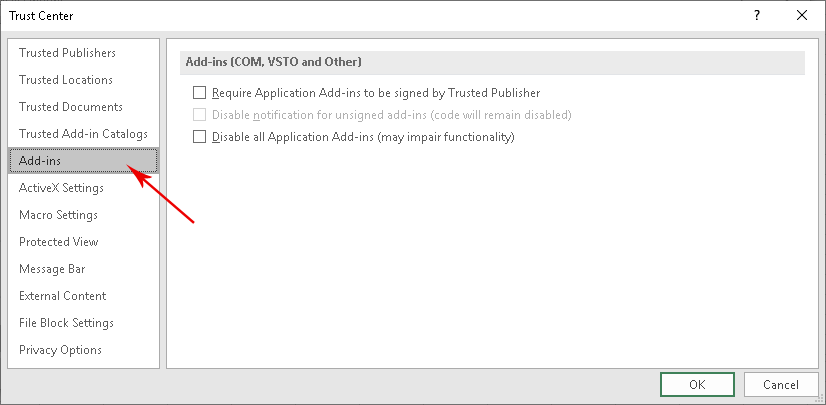
4. Go go the Trust Center tab:

5. Check you didn't touch the default add-in security settings:
Version History
| Version | What's new |
|---|---|
| Add-in 1.4 2012-09-05 | Aztec barcode is now available from the Fast Add tab. |
| Add-in 1.3 2012-08-12 | - Office add-in now supports installation on 64-bit systems. |
© 2026 StrokeScribe. All rights reserved. Use of any portion of this site constitutes acceptance of our Terms of Use and Privacy Policy. The website material may not be reproduced, except with the prior written permission.